How To Burn or Rip A CD/DVD In Windows Using Windows Media Player
A CD or a Compact Disk is a digital optical disc data storage unit. It was developed in 1982 by Philips and Sony. While initially, CDs or DVDs were only meant to place digital audio recordings, they can store anything today.
The primary storage purpose of a CD, however, is to store audio files. They are also used to transfer data from one computer to another while keeping a copy of the files safe in the CD.
To conduct this data shift and transfer, a CD or DVD needs to be burned and ripped.
The burning and ripping processes need external software that can extract and place files into the optical sensor. This software is usually free, but it is difficult to find a reliable option due to its upsurge. This is because most of the software has to be downloaded from websites that might insert a virus into your computer.
For users using computers powered by Windows, the solution to this problem is simple. This is because windows computers come pre-loaded with Windows Media Player. This player can both burn and rip files into and out of a CD.
Read on to know more about the process of burning and ripping a CD through Windows Media Player.
What is Burning and Ripping?
As mentioned earlier, burning and ripping are two processes that interact with a CD’s optical sensor. By doing so, they are used to transfer files from one computer to another.
Burning is the process of copying videos, pictures, or music from your computer to the CD. Typically, CDs can only be burned once. Therefore, they are ideal for sharing large and permanent files. They can also be used to create music CDs, as most record labels do.
Ripping, on the other hand, is the process of extracting files from the CD to your computer. This means that pictures, music, or videos burned into the CD can be stored on your computer.
A CD can be ripped multiple times and is, therefore, the top-most way crooks pirate content. They buy a CD, rip their contents, and burn them into multiple CDs and sell them.
Ripping is often done to duplicate, shift format, edit, or back up media. The rip extracted content is set in destination format and not in source format.
How does Windows Media Player Rip CD?
If you want to preserve your files and audio for an extended period on your computer or other storage devices, Windows Media Player is an ideal medium to do so. Files should not be permanently in CDs as scratches on it can affect the audio and video quality of files.
Unlike the computer’s built-in file explorer, the Windows Media Player rip CD function is effective. This is because it sieves out possible errors and damages while reading your data. Therefore, providing you the best quality files possible from the condition that CD being ripped is in.
Steps to Rip Files from CD Through Windows Media Player
The following steps are to be used to rip files from a CD into your computer. However, they are for users who have access to Microsoft Windows Media Player versions 9 or higher. If you are not clear on which version of Windows Media Player you’re using, follow the given steps to do so.
Determining Windows Media Player Version
Given below is a simple guide on determining the version of Windows Media Player you’re running.
- Click on the Search bar on the bottom left corner of your screen or press the Windows key to open the search menu.
- Type Windows Media Player on the search menu and press Enter.
- Once the Windows Media Player opens, press the Alt key to get a dropdown menu.
- Select Help in the dropdown mentioned above menu.
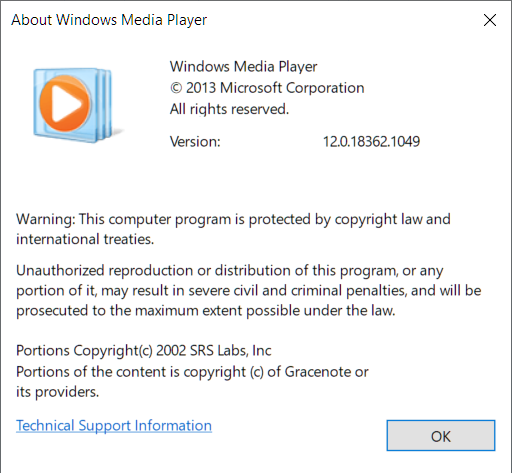
- Press F1, or click on About Windows Media Player. A pop-up window will appear over your player.
- In the pop-up menu, you will find the version details of the Windows Media Player that you’re running.
- If the Windows Media Player version you’re running is 9 or higher, follow the next steps to rip cd.
- If the Windows Media Player version is below 9, head to Microsoft’s website and download an updated version.

Windows Media Player Rip CD Procedure
The following steps will guide you through the process of ripping files from a CD into your computer.
- Open your computer’s CD drive and insert the CD into it.
- Press the Windows key or click on the Search bar on the bottom left corner of your screen.
- Type Windows Media Player and press Enter; Windows Media Player will open up.
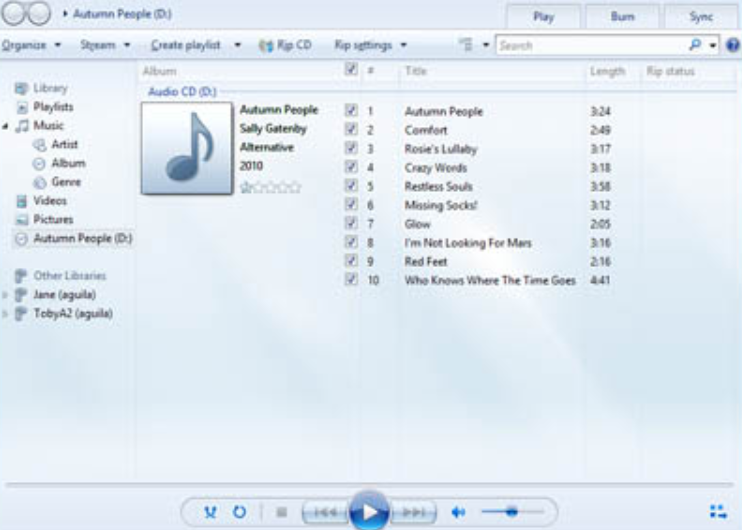
- Select the Rip CD button, which has a downwards arrow upon a CD. For better understanding, here’s a picture of the Rip CD button.

- You can select individual songs that you want to copy by unchecking or checking tracks from the list that appears.
- The ripped files will, by default, be saved in the ‘music’ folder of your computer.
- You can shift these files into another folder for better access. You can also consider moving them to OneDrive for more extended and safer cloud storage.
How to ‘Quick Rip’ Files?
A Quick Rip is a splendid option you get through Windows Media Player if you do not want to directly interact with the player. It is also advisable for larger file sizes, as the process runs in the background.
In case you want a quicker process of ripping files, given below are the steps that can help you do so.
- Open your computer’s CD drive and insert the CD into it.
- Do not open Windows Media Player.
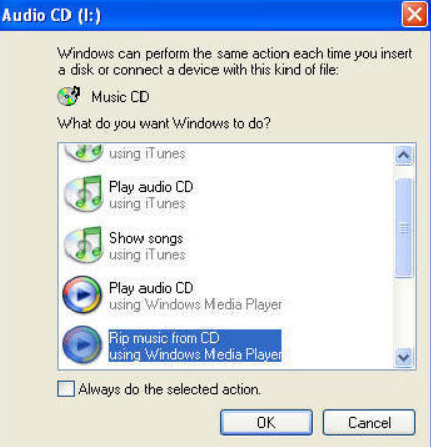
- A popup menu will appear as your computer reads the CD.
- Click on the Rip Music from the CD option.
- The files you have ripped will be automatically saved in your computer’s ‘music’ folder.
- Shift files from this folder to another if you want to. Consider uploading them to OneDrive for safer and longer cloud storage.

Changing File Format and Other Settings During a Windows Media Player Rip CD Procedure
The steps mentioned above will successfully rip audio files from your CD to your computer. However, you might need tweaking the format or other settings of the files while ripping. The following steps will assist you in this process.

- Insert the CD into your computer’s CD drive.
- Search for Windows Media Player by pressing the Windows Key. Press Enter to open the player.
- Go to the Folders list to select your CD. A small silver disk icon represents it.
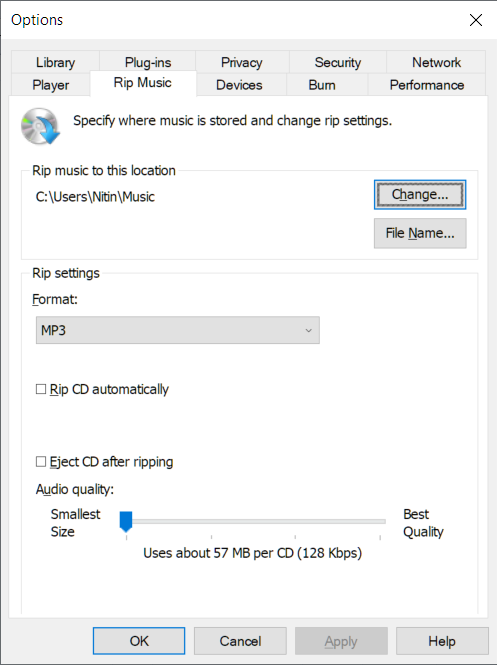
- Go to Rip Settings. Changing these settings will affect how the files are copied to your computer.
- To change the format that your file will be saved in, go to Format in Rip settings.
- A dropdown menu will show all the formats that the file can be saved in. Select the format you want your saved file to be in.
- If you want to change the saved file’s sound quality, select Audio Quality in Rip Settings.
- The Audio Quality options differ in each computer. Although, the range is from as low as 48 kbps to as high as 192 kbps. Select the audio quality you want to sustain.
- Browse through other settings that can be changed from the Rip settings menu. Fix them according to what you want your saved file to be as.
- Once you’ve made all the changes, select Rip CD.
- The Rip CD button will now change to Stop Rip.
- Besides the player controls in the Windows Media Player’s bottom center, you will find the Rip Status column. This column keeps track of the files being ripped and displays the estimated time taken to complete the process.
- Once every file is ripped, exit Windows Media Player.
- Eject CD, and enjoy the ripped music saved in your Music folder.
Summing Up
A complete process of shifting files from one computer to another through a CD involves the following steps. The files have to be burned into the CD, after which that CD will be inserted into the other computer. Once this is done, the files have to be ripped into this computer.
The processes of burning and ripping are relatively simple. Only a few steps help you transfer, edit, and store files for a more extended period. However, it is necessary to rip and store files on your computer because CDs can easily get scratched. Scratching can affect the quality of files stored in it.
There is much software available in the online market that can rip files for you for free. However, external software poses the threat of downloading viruses or adware. They also unnecessarily take up your computer’s storage space.
Instead of relying on external software, Microsoft Windows users can rip files through the built-in Windows Media Player. This player effectively rips files from the CD to your computer and does so while checking for file damages. It then actively corrects those damages and gives you the best result possible.
Related Posts
- How To Fix Headphones When Only One Side Works
- Useful shortcuts equivalents on MacBook Air with Windows 7
- Best Video Player For Windows 10 PC
- How To Fix Cursor or Mouse Pointer Disappears in Google Chrome Browser
- How To Use iMac As Monitor – Target Display Mode
- How to Factory Reset a Toshiba Laptop Yourself
- Slow bootup in MacBook Air, Windows & Bootcamp
- How To Use Keyboard Shortcuts To Apply Strikethrough Or Crossout In Word
- How To Fix “Server IP Address Could Not Be Found”
- How to Enable Dark Mode/Light Theme in Chrome
